User Guide v12.1
Preface
Audience
The target audience of this document is the UCCX agents and all users who will be using the gadget.
Conventions
This document uses the following conventions.
Convention | Description |
boldface font | Used to describe the menu items or field names |
Italic Font | Used to describe important notes |
Getting Started
Introduction
Customer Interaction Manager (CIM) acts as a single repository to store customer interactions. It receives and retains all interactions of a customer with the call center for tracking a 360-degree view of a customer journey. It provides interfaces to capture real-time and historical information for callers/customers. Administrators can define and extend the contents of the customer and request objects, attaching fields and information to them as per their requirements.
CIM Architecture and Components
CIM Profiles & Interactions mainly consists of 3 generic extendible objects:
Customers - Every contact approaching the system through any channel is identified as a customer
Requests - A Request is the interaction context that the customer is approaching and can refer to for any past interaction.
Interactions - An interaction stores information about the communication taken place through the respective channel.
All client applications including IVR, Finesse gadgets, and 3rd party applications access CIM via REST APIs to fetch and store information.
Customers
In CIM, every contact approaching through any channel is stored as a customer. The administrator can extend the customer object and add attributes to identify and manage the customer data. It also allows to upload new customer records and update existing records based on new interactions happening.
Agents/supervisors can choose to view a customer profile at any time regardless of an active call. Clicking on a customer record from the address book (on the left) opens up the recent past interaction history of the customer.
Agents can choose to see the complete customer profile and also make a manual outbound call to the customer contact.
Interactions
On CIM Interactions, agents can see the recent past interactions of a customer on all channels. This way agents can handle the current customer interaction knowing the complete customer context by drilling down the past interactions, seeing who handled the last interactions and what were the post interaction treatments.
Agents can also filter interactions based on a Request to track the customer journey in a particular customer context.
A contact center voice call interaction can further combine multiple activities/interactions such as an inbound call with two sub interactions i) for the time spent in the IVR ii) transferred to agent interaction (if the customer opted to talk to an agent). There can be more than one agents (or external Jabber users) handling the customer query for the single call.
Requests
Every customer interaction is mapped to a certain request. A request identifies the interaction context. This could be a trouble ticket, an information request, or work order to process. CIM administrator can extend the Request object and define additional types of requests that the business needs to process.
Upon a customer interaction via phone call or other channels, an agent can create a new request (or choose one of the existing open requests) and link it with the current interaction.
There are some system-defined fields for a request as follows:
Request Title: This contains the title of the request and is a mandatory field
Description: This is an optional field containing a brief description of the request
Request Type: The user can add custom request types based on the type of requests the business needs to process. While opening a new type of request, the appropriate fields are shown up based on the selected request type.
Status: A request can have only two possible status values:
Active: Representing that the request is opened. New interactions can be linked with an existing, active request.
Closed: Users of CIM can later also choose to close a request with valid user credentials and access rights. Any new interaction cannot be linked to a closed request.
Workflow
A call comes into the call center and routed to an available agent.
System checks if a customer record with the incoming ANI exists already. If no existing record is found against the caller ANI, the application automatically opens the “Create Contact” form for the agent to add the customer profile in the database.
If a customer record already exists, it brings the customer’s interaction history automatically on the agent desktop. By default, the system fetches the last 9 interactions of the customer with the call center.
The agent accepts the call.
To view or edit the profile of the customer, the agent can select the “View Contact Info” option.
To create a request, the agent can click on the “Create Request” option under the three dots available beside the customer name.
To link the call with an existing request, the agent can search the request with its title from the “Filter Requests” dropdown and pick one from the search results. The call will be linked automatically with the selected request.
Note:
If the agent or supervisor does not accept the call (after the call has landed on the Finesse desktop), the call interaction is still stored in CIM, tagged also with the agent name to whom it was routed.
The CIM application offers the following types of interfaces:
The admin interface
The agent gadget
Logging in as an Admin
Administrators log into CIM admin application by entering the admin application URL in the browser address bar.
The administration interface allows administrators to manage configurations such as the “Contact Schema” and the “Request Schema”. Log on to the application with the admin credentials.

Language Menu Options
Change the language of the UI from one of the languages available in the “Languages” dropdown.
Click the settings iconon the right of the screen to manage the CIM Configurations.
Click the icon to log out from the application.
Note:
After logging in on the admin interface, pressing F5 or Ctrl+F5 makes the CIM configurations tab to disappear. This requires re-login to fix the issue.
Note that only the UI fields are translated according to the language selected from the Languages dropdown. No data getting stored in the DB is translated, i.e. the data is always available in the native English language. This also means that any customized contact or request fields that the user /admin creates from the Contact and the Request Schema will NOT be translated.
Logging in as an Agent or Supervisor
CIM Finesse gadget provides agents and supervisors with an interface to manage customer profiles and view interaction history in the gadget. Users must have the necessary permissions from the admins to manage profiles and view interaction history.
The CIM gadget also allows agents and supervisors having permissions on CIM to get logged on to the gadget automatically with CCX credentials when they log on to Cisco Finesse desktop, without the need to re-enter their CCX credentials in the gadget.
If the admin updates the “Contact”/“Request Schema”, users will have to log out and log in again into the gadget. The changes applied by the admin will only reflect when an agent re-logs into the gadget.
Note:
The gadget also now supports automatic login for SSO-enabled agents. This means that agents and supervisors when logged on to the Finesse desktop, also automatically log on to the CIM gadget.
Every user(Supervisor/Agent) can log on to CIM gadget
By default, all application users have read-only permissions. i.e they can search and view contact details of customer contact. For all the rest of the operations, the admin must assign each individual permission for the task to the user. See User Management section to learn more on how to assign permissions to users.
CIM Configurations Management
Only the system administrators or users with an “Admin” role can make changes to the configurations.
Create Contact Schema
The “Contact Schema” allows business administrators to add custom attributes to store any business-specific information for the customers. While creating new contacts, those additional user-defined fields are then available to agents/supervisors.

To start adding the new fields in the “Contact” object, click on the “ADD FIELD” button. While defining new fields, the user will need to select the following:
Label: Provide a name or label to the field.
Type: Select the type of input the field should expect. Currently, the application supports the following types of inputs:
Text: This could be any text value
Numeric: This expects any positive integer
Phone: This expects the phone number of the customer in the format, +123123123123 with validation of up to 14 characters (min 3 to and max 14).
Email: This expects an email address in the format abc@example.com
Required: Turn the flag ON to mark a field as a required field. Keep it OFF for optional fields.
Click on the “tick” icon to save the new field.
Please note that some of the system-defined fields already exist in the Contact Schema which is available by default. Those fields are:
First Name: The first name of the customer
Last Name: The last name of the customer
Phone 01-Phone 05: These fields store up to five phone numbers for a particular customer.
Email: The email address of the customer
Note:
While uploading contacts in bulk through CSV files, users can only upload data for the system-defined fields only. To add data for custom fields, the user needs to enter this manually through the application once the bulk upload operation is complete.
Create Request Schema
The “Request Schema” defines the type of information that should be stored while opening customer requests. Agents and supervisors will be able to see the type and number of request fields in the CIM Finesse gadget based on the fields admins define under the “Request Schema” from the CIM admin portal.

The user first needs to define the customized request types against the field label “Type”. These request types are used to group or categorize further request fields based on the type of the requesting customer wants to open. For instance, for a type of request such as “complaint”, the business requires to take device or model number against which to open the complaint. Similarly, for a different type of request such as “Sales”, the business needs to take the desired service or package that the customer would like to subscribe.
To add Request types, the user needs to type in the name of the request type and press ‘Enter’ to add it into the system. To add more, just repeat the same step.
To start adding custom fields in the “Request” object, click the “ADD FIELD” button. While adding new request fields, provide the following information:
Label: Provide a name or label to the field,
Type: Choose the input type from this dropdown. Following type of inputs are supported at the moment:
AlphaNum15: This accepts an alphanumeric input for up to 15 characters.
AlphaNum50: This accepts an alphanumeric input for up to 50 characters.
Email: This accepts the Email input in the form of an email.
Phone: This accepts the phone number in the form of number format.
DateTime: This accepts the DateTime input in an alphanumeric format.
Time: This accepts the time input in an alphanumeric format.
Duration: This accepts the Duration input in an alphanumeric format.
Text: This accepts the text input in the form of text.
Type of request: Choose by clicking on the pencil icon that which “Type” of request this field should belong to. Based on the type of requests, the appropriate request fields are then visible to agents, supervisors while filling out the Request form. At least one type must be defined under the Request Schema.
Required: Set this flag to mark a field as a required field.
Click the tick icon to save the newly-added fields.
Note:
This settings icon is present only on the admin portal to manage CIM configurations and not available for agents/supervisors on the Finesse gadget. This means that if any user has to manage these configurations, he’ll have to log on separately to the admin portal.
The data type of an existing request schema attribute should not be changed later. If the field with a new type is required, add a new field with the desired data type. Do not update the existing one. It may cause data corruption at the database level.
Contacts Management
This interface allows users to view and manage customer profiles with or without having an active call.
For the users of the gadget, the “Contacts” list on the left side is by default empty. This is because, for agents and supervisors, they’ll automatically see a customer profile popped up by the gadget when the call lands on the Finesse desktop and the user accepts the call. Without an active call in progress, the user will have to search for a customer profile based on one of his phone number, First name or Last name of the customer in the “Contacts” list to view or update his profile (if the necessary permissions are assigned to do the job).
Administrators, however, can view top 20 customer contact records in the “Contacts” list at any given time. To see more, the admin will have to search the contact in the “Contacts” list based on the customer’s exact phone number.

Note:
For now, the search can be done based on the five phone numbers (phone 1-5) and the customer’s first name, last name only. Search based on any other field is NOT available.
When the user types in some characters in the search bar, the search results show all customer records which contain that string in the name (either in the start, middle or at the end of the name).
The user will have to press ‘Enter’ after typing in the search string.
The application always shows the first name and the phone 01 of the customer in the search results regardless of which name (either first or last name) and phone number the search string contains.
This means that if the customer is matched with the search string (the phone number exists in the customer profile in any of the five phones or the name matches to either first or last name of the customer), the customer record will be popped up in the results.
To search a contact based on the phone number, type the full number or partial number and press Enter key.
It takes about 5 seconds to search customer contact in a DB of 15 lac contacts.
Only the top 20 contacts are being displayed to the admin on the admin interface. The rest of the contacts can be seen by searching the contact
Creating a new customer profile
To create a customer profile, hover the mouse over theicon and click on the “Contact” button. The “Contact Info” panel will be opened on the right side of the screen with a form to fill in the information of the customer. Provide the following details while creating the profile:
Field | Description | Required |
First Name | This is the system-defined field and stores the first name of the customer | Yes |
Last Name | This is the system-defined field and stores the last name of the customer | No |
This is the system-defined field and stores the email address of the customer | No | |
Phone 1 | This is the system-defined field and stores the phone 01 of the customer | Yes |
Phone 2-5 | This is the system-defined field and stores the phone 02-phone 05 of the customer | No |
Custom fields | Any custom fields added by the administrator under the “Contact Schema” will be available here. | The admin can choose to mark some of the custom fields as required or optional. |

Once done, click the button to save the changes.
To store more customized information other than the data in the system-defined fields, such as “customer address”, “account type”, the administrator or (the user with an “Admin” role) will have to define custom fields under the “Contact Schema”. See Create Contact Schema to learn how to add new custom fields.
Note:
Profile picture cannot be uploaded for customers at the moment.
Creating customer profiles in bulk through a CSV
To create customer profiles in bulk, hover the mouse pointer over theicon and click on the “Upload Bulk Caller” option.

Select a CSV file from your machine directory and click “Save”. The file will be uploaded. To verify the file format, the user can download the sample CSV file link available with the Bulk Upload feature.
Note:
At max, up to 100,000 contacts can be uploaded at a time without any interruption
The average time to upload a file of 100k contacts is 15-25 seconds approx
While uploading a csv, the user can only upload the data in the system-defined fields
At the moment, only the admin or the user having the permission to “create contact” can create customers in bulk.
The field names in the CSV file are not translated into the language as per the selected language from the “Languages” dropdown on the interface. For now the CSV file is only available in the English language.
Updating a contact
To update an existing customer profile without having an active call in the background, look for the customer profile in the “Contacts” list or search the customer profile based on his phone number and click on the record it to view the profile.
Once the contact is selected, the application will show its recent interaction history. Click on the three dots located in the top right corner beside the customer name and select the “Contact info” option from the drop down to view and update the profile.

In the “Contact Info” panel, make the desired changes in the customer profile and click the “Save” button once the changes are done.
Interactions History View
The Interaction History View allows users to see the recent past interactions of a customer.
For now, only the voice interactions are stored in CIM.

Following details of interaction are available on the application:
Field | Description |
ANI | This shows the customer’s phone number from which the call was received |
Calling Date and Call Duration | This shows the total call duration and the on which the call was received. |
Call Wrap up | This is the Finesse Wrap-up provided by the agent/s who handled the call. |
Agent ID | The shows the ID of the agent who handled the call. |
Call Type | This shows the type of the call. It can assume the following values:
|
Team | This shows the name of the team of the agent who handled the call |
Start Time | This shows the time when the call was landed on the Finesse desktop |
Multi-legged call
This type of call happens if there is more than one agent that has handled the call i.e in case of a transferred or conference call.
Transferred Call
When a call is transferred from one agent to the other agent, two call legs are formed, one for each individual agent. For instance, the screenshot below shows that the first call leg having the type “INBOUND” was first landed to the agent “shabber” and was later transferred to another agent “hassan1” having the call type as “TRANSFER”.
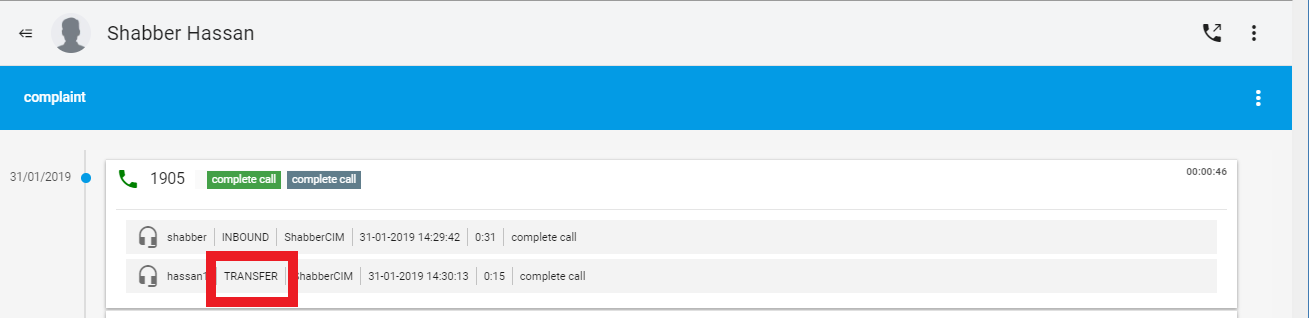
It should also be noted that each leg will have its own wrap-up applied by the agent who handled the call leg. However, if the second agent doesn't apply any wrap-up to the second call leg, the same wrap-up applied by the first agent (to the first call leg) will also be stored for the second call leg.
Also, in this case, if both of the two agents associate the ongoing interaction with two different requests, the interaction will finally be linked with the request that the second agent selects (hence, overwriting the changes made by the first agent).
Conference call
Similar to Call Transfer, multiple call legs are formed in case of a Conference call since there could be two or more agents involved in the same call. For instance, the screenshot below shows that the first call leg having the type “INBOUND” was first landed to the agent “shabber” and was later transferred to another agent “hassan1” having the call type as “CONFERENCE”.

In this case again, the call will have two wrap-ups, each applied by the individual agent for each individual call leg. The principle of application of wrap-ups and the association of the interaction with a request is the same as it is for the Transferred call.
Making an outbound call to a customer
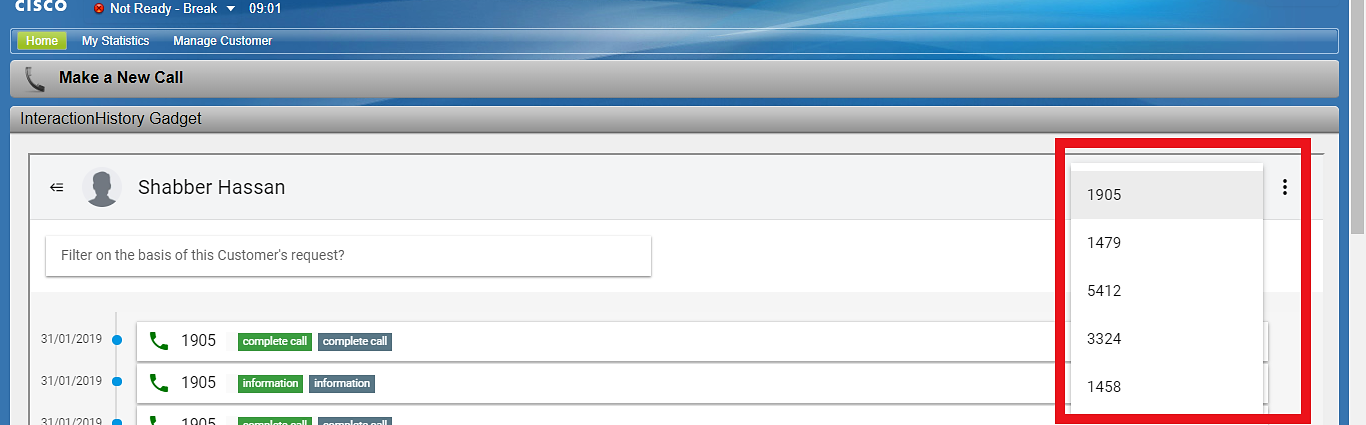
Using the CIM gadget, agents and supervisors can also make an outbound call to any customer. To make a call, an agent first needs to search the customer from the “Contacts” list and open its record. In the Interaction History View, the agent will see a phone icon on the top right of the gadget to make a call beside the name of the customer.
A list of all five phone numbers will appear (if exist) as shown in the screenshot below. Select the desired number from the list and make sure that the agent is in the “Not ready” state to initiate the call.
Once a call is received and connected, it will be recorded in CIM as an OUTBOUND customer interaction as shown in the screenshot below.

Note:
This feature is NOT available for administrators, that is, administrators cannot make an outbound call to the customer from the admin application. Instead, they have to have a supervisor or an agent credentials and log on to the Finesse gadget to make a call to the customer.
Request Management
Administrators (or users with an “Admin” role) can create custom fields under the “Request Schema”. See Create Request Schema to learn more about how to customize the request schema. Agents and Supervisors can then open requests for customers based on their conversation with the customer on call. The user (with permissions granted) can create, update, view and change the status of customer requests.
Create Requests
To create a request, the user first needs to select a customer profile against which the request has to be opened.
Once a contact is selected, click on the three dots appearing in the top right corner. From the drop-down list, select the “Create Request” option.

The “Request” details form will appear. The fields in the Request form (other than “Title”, “Description”, “Type” and “Status” fields) are shown based on the schema definition under the “Request Schema” by the system administrators. This allows users to open only the business-specific type of customer requests as specified by and aligned to the business goals. See Create Request Schema to learn more about the request object definition.
Fill in all the fields and click the “Save” button. If you’re having a difficulty
Field | Description | Required |
Title | Title or name given to the request. This is a system-defined field. It can take a title of upto 50 characters at max. | Yes |
Description | An optional description or summary of the request. This is a system-defined field. It takes a description or summary of the request for upto 150 characters length | No |
Type | This shows a dropdown of the available list of types of the requests. This list populates based on the request types as defined by the administrators under the Request Schema. | Yes |
Status | A request can take the following possible states in CIM:
| Yes |
Custom fields | Any custom fields as defined under the Request Schema are available here based on the “Type” of the request selected above by the user. | Custom fields can be chosen to be marked as required |

Once a request is created, it will be available in the “Requests” search drop-down list. To select a request to view its details later, search the request based on the request title and click on the desired request in the drop down to view the request details. Also, to search which interactions are linked with which requests, search the request from the dropdown and select the desired one to see all interactions linked with that request.
Note:
At a time, the latest 100 requests can be listed for a particular customer in the search dropdown
Both “Active” and “Closed” requests are being listed in the search dropdown. However, in case of an active call (in the background), the search dropdown only lists the “Active” requests of the customer.
Requests can be searched based on the name of a request
Update Requests
To update a request, type the name of the request in the search bar and select the desired request from suggestions.
On the blue bar for the request name, click on the three dots and select “View Details” option to view the request details.

Update the desired fields and click on “Save” button to save the changes.

Note:
The live Interactions or calls can only be linked with “Active” requests.
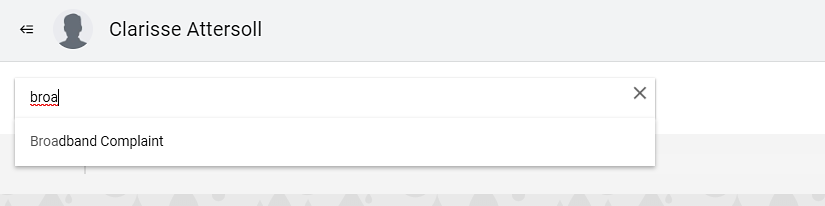
Associating an interaction with an existing request
Users can also associate an ongoing interaction or customer call with an existing customer request such as in case of a follow up call.
So when a call comes in, the user will need to search the existing request from the “Request filter” in the Interaction History gadget and select the desired request from the search results.

Once the request is selected and the call is ended, the interaction will automatically get linked with the selected request.
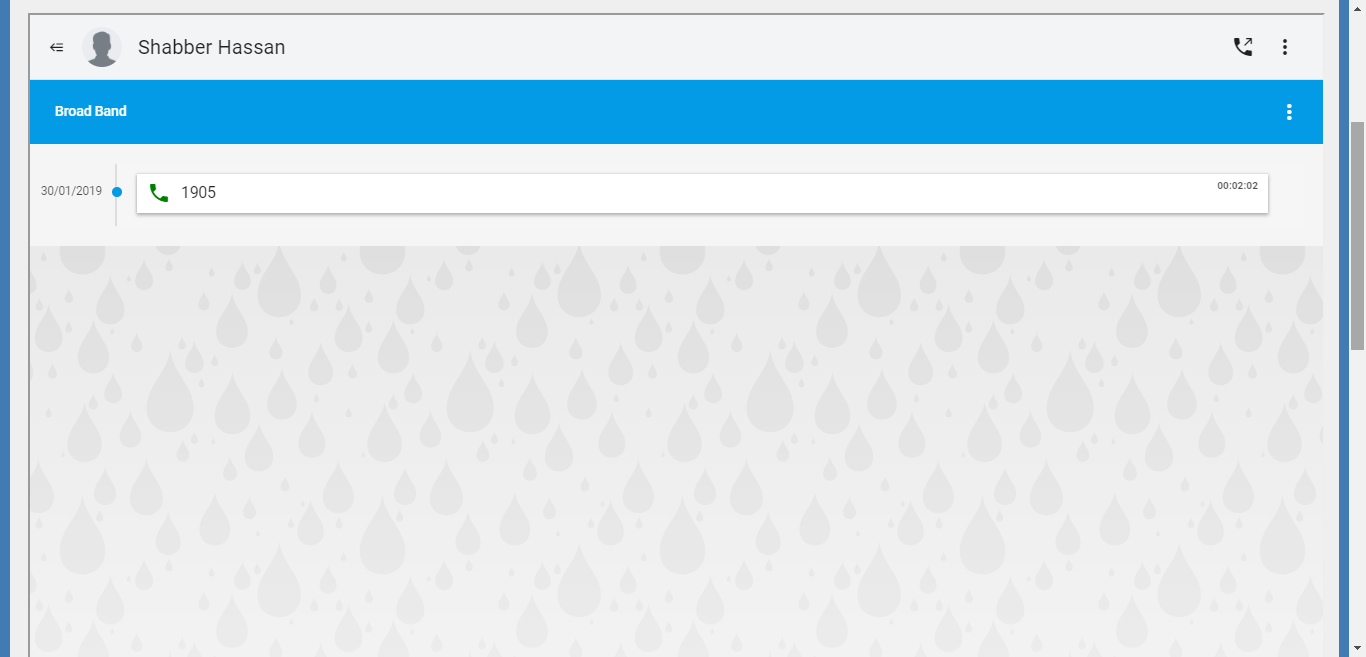
If the user, later on, searches a customer profile and likes to view the request with all associated/ grouped interactions under the request, the user will have to search the request first using “Filter requests” search bar and click on the desired one from the search results to see all associated interactions as shown in the screenshot below.
User Management
There are three types of users in the module:
UCCX Supervisors: All users synced from CCX having the CCX “Supervisor” user capability in UCCX into EF’s User Management application. Note that the user capability in CCX is synced with UCCX only for the first time. If the capability is changed from “Supervisor” to “Agent” or vice versa, it is not synced within the application. The user credentials of these users are the same as that of UCCX/ Finesse and do not need to be redefined in EF application. Also note that the role “Supervisor” in the EF application is internal to EF and is not synced back with UCCX.
UCCX Agents: All agents having the “Agent” capability in CCX synced from UCCX into EF’s User Management application. Note that the user capability in CCX is synced with UCCX only for the first time. If the capability is changed from “Agent” to “Supervisor” or vice versa, it is not synced within the application. The user credentials of these users are the same as that of UCCX/ Finesse and do not need to be redefined in EF application. Also note that the role “Supervisor” in the EF application is internal to EF and is not synced back with UCCX.
Local application users: All users who are created locally within the application by the system administrator or an authorized user. These users have their own user credentials defined within the app and are not synchronized from UCCX.
Except for the master / DB user (provided by EF to log on for the first time), each CCX Supervisor synced from UCCX with the user capability “Supervisor” by default has the “Supervisor” role in the EF application. Similarly, each CCX “Agent” synced from UCCX with the CCX user capability “Agent” by default has the “Agent” role assigned in the EF application.
To make a user an administrator, the admin needs to update the user profile and update its role from “supervisor” to “administrator”. Note that this updated role is ‘internal’ to the EF application and has nothing to do with the user capabilities of UCCX.
Go to Users page to see a list of all system users. Note that the users on the list are UCCX supervisors, agents and administrators.
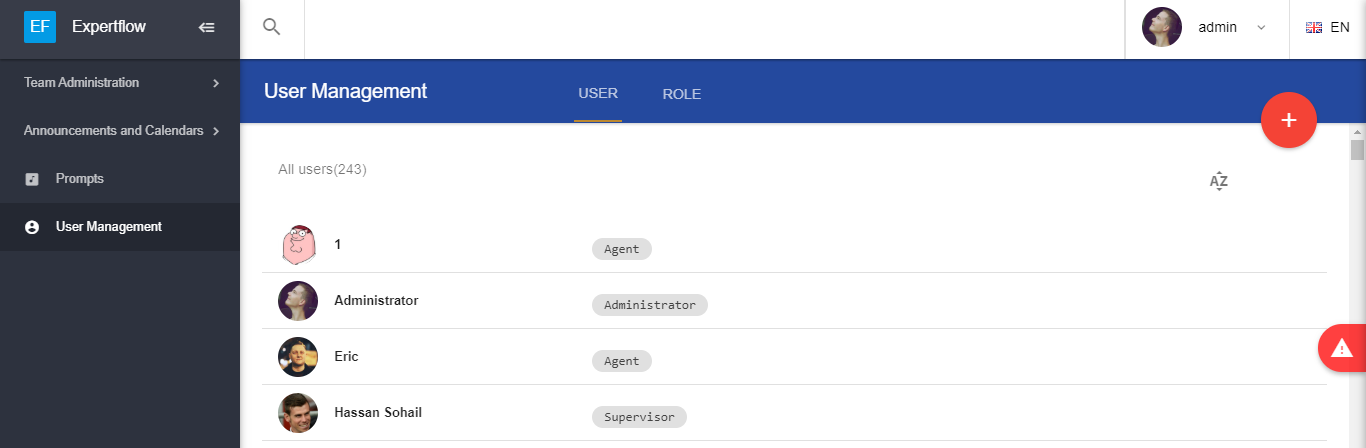
All users with their assigned respective roles are listed on the page.
To quickly find a user, click the search icon on the top and write the name of the user in the search bar.
It should be noted that all CCX “Supervisors” and “Agents” are synced automatically in the User Management application from UCCX and become the application users by default. To assign permissions to these users, see Creating Roles and assigning Permissions to users
Creating local application users
An administrator can also choose to create local user accounts within the application. To create a new user, hover the mouse pointer over the ‘+’ button and click on the “Add New User” option. Fill in the “New User” form and click the “Add User” to save.
Fill in the form using the table below.
Field | Description | Required |
Status | This is the current status of the user in the application. You can turn this on or off to make it “Active” or “Inactive” (respectively) in the EF application. Note that the Inactive user won’t be able to log on to the EF applications. By default, it is turned off. | Yes |
Username | Define here the username of the user. Note that any special characters, spaces, characters less than 3 and greater than 30 are not allowed in the username field. | Yes |
Password | Define here the password of the user. Note that the length of the user password should not be less than 8 and greater than 30 characters. | Yes |
Full Name | Define here the full name of the user. Note that the length of “Full Name” should not be less than 3 or greater than 100 characters. | Yes |
This field stores the email address of the user in the format abc@example.com | No | |
Picture | Upload picture of the user in this placeholder. | No |
To edit a user’s profile or assign roles to the user, click the user record from the Users list and edit the desired attributes. Click the “Roles” dropdown and pick the desired roles from the list to be assigned to the user.
The admin can also optionally upload a picture of the user on the interface to quickly identify the user.

To manage permissions or assign roles to multiple users, see Creating Roles and assigning Permissions to users below.
Creating Roles and assigning Permissions to users
To create a new role, hover the mouse pointer on the ‘+’ button and click on the “Add Role” option. Provide a name to the role and click the save button. The role will be created.
Once the role is created, the admin needs to assign certain permissions to the role. To assign permissions, click on the “Role List”. Click the desired role from the list and click on the “Permissions” drop down. Select the desired permissions from the list to be assigned to the role.
Now select user(s) from the “Users” drop down to assign the role to the user and click the update button.

Deleting Roles and Users
To delete a role, search the role name from the top search bar or select the role from the Roles list. Hover the mouse pointer on the desired role and click the “Delete” button. To delete a user, search the name of the user from the top search bar or select the user from the Users list. Hover the mouse pointer on the desired user and click the “Delete” button.
Note:
Only Admin has access to Users page.
If the name of a user is updated from CUCM, it takes a few mins to reflect the changes in UCCX and so in the EF application.
All permissions are system-defined and cannot be changed or deleted. Users can only change and delete the roles from the DB.
If a role assigned to the user is deleted and there are no other roles/ permissions assigned to the user, the user will not be able to do anything unless the admin assigns some roles to the user again.
For a contact center “Agent” or “Supervisor” synced directly from CCX, the user can only update the user’s profile picture or the email address fields
A user by default, has the has the read permission on all the lists
All contact center users synced from UCCX (defined in CUCM) cannot be removed from the EF application. To delete those users, they must be deleted from CUCM.
To sort roles and users list, click on the “AZ” sort icon in the desired list and select A to Z or Z to A for listing roles and users in ascending or descending orders respectively.
The password of a local user cannot be modified or viewed later. In case if a user forgets his/ her password, the administrator will have to create a new user account for the user with a new password.
An agent or supervisor with a default role can still answer a customer call, view its profile and the existing interaction history. However, to save any changes such as creating / updating customer profile, link interaction with a request or create a request will require the user to have respective permissions assigned from his administrator.